
My Homemade Robot
by Molly Flynn
I first heard about robots when my brother made one for his fourth-grade class. I always thought it was cool that you could make an inanimate object move and do things for you. I’m very into robots because there are so many things you can do with them, and they are super useful.
So, I decided I wanted to make one. I wanted it to move and look like a mad scientist. I learned to build a robot by watching a few videos. My grandfather makes things out of metal such as toys and robots. He was very helpful.
I did this project in my kitchen with my mom and grandpa. Each step took five minutes to an hour.
Now, I’m going to tell you how to make this robot.
The items you will need are an RC car, two metal bars, four AA batteries, scissors, glue and a mini saw. Decorations (optional): oatmeal tube, mashed potato container, velcro, markers, paper, paint, googly eyes and cotton balls.
Now I will take you step by step on how I did it.

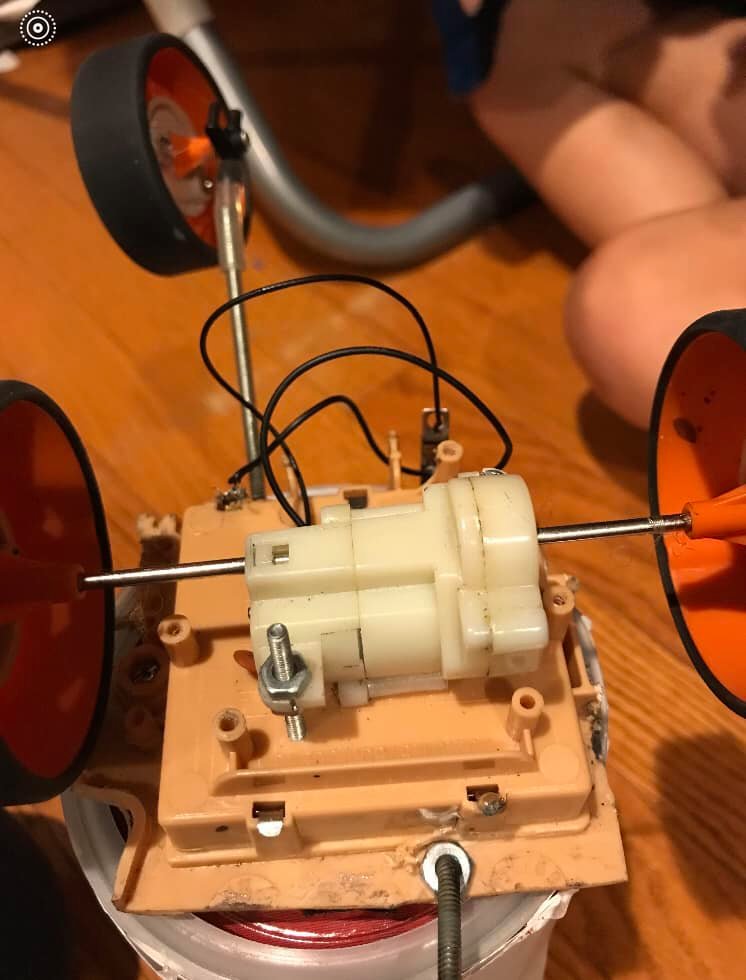


Step 1, disassemble the RC car so you can see the motor and the motherboard.
Step 2, disconnect the motor from the motherboard and make sure that you have only 2 wires sticking out.
Step 3, remove the battery compartment with the saw.
Step 4, connect the wire to the battery pack. There should be a hot wire and a ground wire. That’s where we added the switch.
Step 5, attach the motor to the battery pack.
Step 6, add 2 bars to the sides of the battery pack and put the wheels on there.
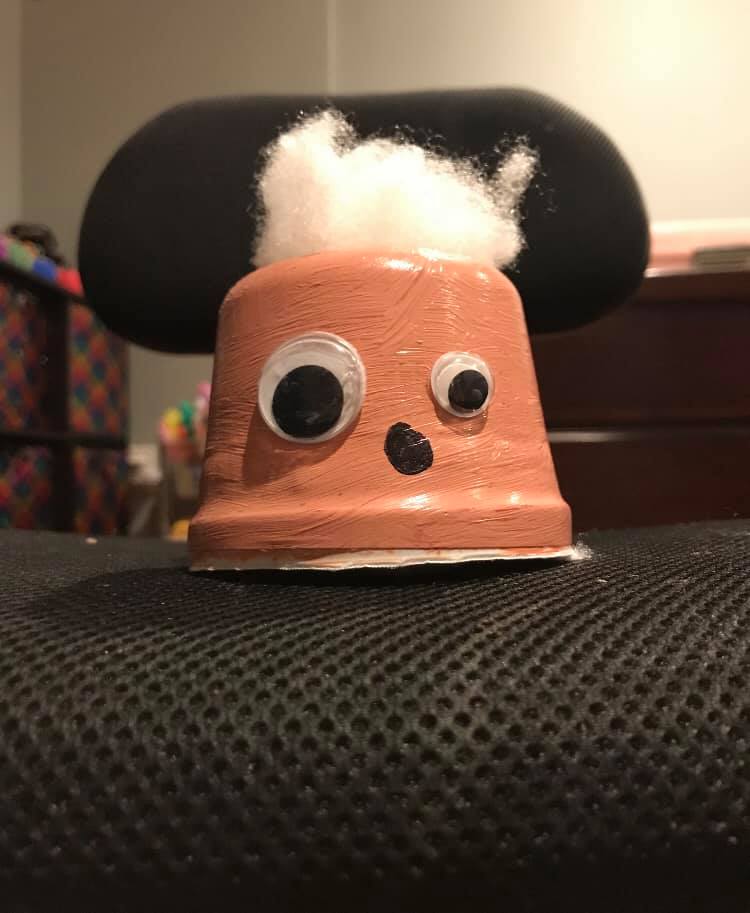
Step 7, decorating time. Put paper on your oatmeal container.
Step 8, color the oatmeal tube so it looks like a shirt under a lab coat.
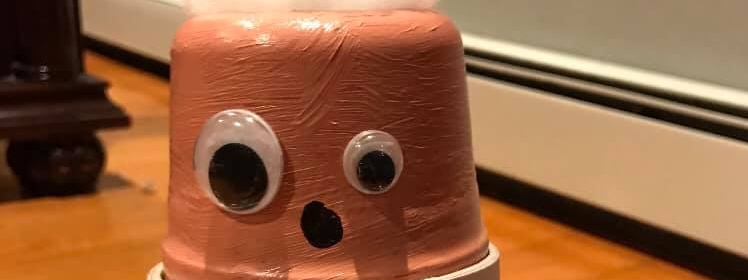
Step 9, Paint your mashed potato container with a skin tone color.
Step 10, put your googly eyes on your mashed potato container.
Step 11, draw a mouth on the mashed potato container so it looks like a face.
Step 12, put cotton balls on his head so it looks like he has crazy hair!
Step 13, put head on the body.
Step 14, use velcro to attach the body to your robot.
Step 15, ENJOY!!!

THAT’S AWESOME MOLLY!!! CONGRATULATIONS!
LikeLike
Awesome!
LikeLike